Here's a winter tip from your friendly photographer buddy, me. Many of you already know this, but you may not know the why of it.
The exposure meter in your camera, that sensor and logic that tells the camera how to expose your picture based on the current conditions, assumes that every scene will reflect an average amount of light. Experimentation has shown that an average scene reflects about 18% of the light that hits it. It's a generalized number and it works great for most scenes.
But if the scene you are photographing reflects more or less light than this on average, the exposure your camera calculates will be wrong.
Fresh snow is very bright white. And the reason it is very bright is that it reflects most of the light that hits it - that is WHY we see it as bright.
You probably see where this is going.
When you photograph snow, your camera does like it always does: it measures the light coming in from the scene and assumes the light it sees is the 18% reflection off the scene. But because snow reflects so much more than 18% of the light that strikes it, this calculated exposure will produce an underexposed image. Your camera has been fooled.
This will be more noticeable if most or all of your scene is snow, because the calculation is typically some kind of average for the scene.
And THAT, my friends, is why your snow always looks gray in your pictures when you can plainly see that it is most certainly NOT gray, it is pure white.
Your snow is simply underexposed.
So what to do? The solution is simple - you need to tell your camera to overexpose the scene. Yes, as crazy as it sounds when you are staring at a field of blinding white powder as far as the eye can see, you have to OVERexpose snow to make it look correct in your picture.
The trick is to dial in just enough added exposure to bring the snow up to white without pushing it so far that it becomes completely stark white and you lose picture information. Incidentally, this is called "blowing your highlights". No jokes now, we're all adults here. I usually overexpose by about 2 stops, but just try it and see what works.
Incidentally, 1 stop is a halving (-1 stop) or doubling (+1 stop) of light reaching the sensor or film. A 2 stop underexposure error by the camera is HUGE. It is 4 times less light than a correct exposure would be. Unless you are shooting and editing your pictures in the "raw" format of your camera (.DNG, .CRW, .CR2, .NEF, .NRW, etc.) or on film, you will not be able to correct that kind of error after the picture is taken. A .JPG file simply doesn't have that kind of dynamic range. That's why this can be very important.
There are also scenes that can fool your camera in the other direction, some scenes reflect very little light and can make your camera overexpose as it tries to get the scene's average brightness up to 18%. Lots of dull vegetation in a picture seems to do this.
So why don't they make cameras smarter? It's not that easy. Many cameras allow you to control which part of the scene is used for the 18% average by switching metering modes. Common modes are "Center Weighted Average", "Evaluative", and "Spot" metering, all of which can be useful in certain circumstances.
But remember one important fact as you think about this: many scenes do not have one "correct" exposure across the frame. There are many times when a scene may contain dark shadows underneath some subject, or a very bright patch of sky in one corner. In these cases the camera has to make a snap decision on which part of the scene will be exposed correctly. And although modern cameras have dizzyingly complex algorithms to help make this choice, they cannot account for all eventualities and they sometimes just fall flat on their faces.
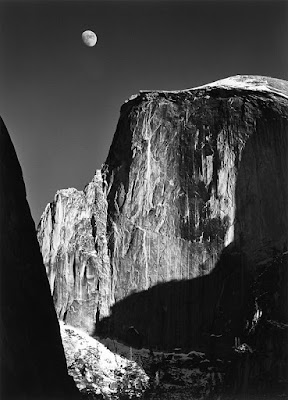
In 1941 Ansel Adams and Fred Archer developed an elegant and sophisticated methodology called The Zone System, which used "tone mapping" to establish the dynamic range of a scene across a gray scale in great detail, and allowed the photographer to chose exposure based on exactly how he wanted the various shades to render in the final image. And if you've ever seen the work of Ansel Adams, you know how good The Zone System works in choosing exposure in a complicated scene.
 Now, while you may not want to invest that much time in one picture, you do still have control and if you use your eyes and the histogram on the preview screen of your camera, you can often get very close. I've guessed exposures at shoots before when my light meter wasn't working and everything came out fine. Don't be afraid to experiment with exposure, you will not break your camera. In fact, setting your camera on "M" can be one of the most liberating experiences you can have with an electronic appliance.
Ok, NOW you can crack jokes.

3 comments:
I'm probably the only one who read and stayed awake for the whole thing, but nice lecture!!
My Brownie NEVER had that problem
True. Most films (except slide film) have a nice amount of exposure latitude. Which means you can be off by quite a bit and correct it in development. Some of the Brownie cameras used a fixed exposure with no way to change it. The rest were very limited. But the pics came out ok because the brightness was corrected when it was printed.
Post a Comment